Wednesday, November 30, 2011

Cadoodle (Car & Doodle) Carrier Tutorial

Last year I was trying to find different ways to keep my little two-year old son busy & quiet during church.  I searched a lot of blogs and etsy shops looking for that one perfect idea!  I stumbled across a couple of car carriers and also bags to carry paper & crayons.  So I decided to get creative a make a two-in-one carrier, THE CADOODLE (car & doodle)!  This is an original name (I have not seen it anywhere), therefore, please make for personal use only - which means no selling/redistribution, entering contests, etc...


Materials Needed:          

1 – 10” x 12.5” Main Fabric

2 - 4.5” x 10” Background Fabric

1 – 4.5” x 10” Black Fabric for Road

1 – 6” x 10” Car Pocket Fabric

1 – 6” x 10” Notepad Pocket

4 - .5” x 1.5” Yellow Felt for Road dividers

2 – 1” Velcro front/back

1 Steno Notepad

24pk Crayola Crayons (8 fit in Cadoodle)

4 Die Cast Cars

Ruler, Rotary Blade & Mat

Sewing Pins

Fabric Marker

Sewing Machine

Thread

Iron & Ironing Board                                                                                 


Seam allowance:  ¼”


Directions:            

Step 1:                       
Cut your fabric with a rotary blade & ruler or you can use scissors.

 
Step 2:           
Take your 6” x 10” Car Pocket Fabric, fold it in half, and press.  Repeat with Notepad &
Crayon Pocket piece.  Line up raw edges to background fabrics and pin in place.  Sew along bottom edges to secure. 

Step 3: 
Center Velcro piece onto car pocket fabric leaving 1 inch from bottom edge. Sew around
edge of Velcro using zigzag stitching.        

(Special Note:  It works better to use two 1-inch velcro on corner edges.  Place velcro 1-inch from bottom edge and from side edges)
  

Step 4: 
Center opposite Velcro piece onto main fabric leaving 2-5/8” space from bottom edge.
Sew around Velcro edge using zigzag stitching.

(Note:  with using two velcro on side edges, velcro onto main fabric 1” from side edges and 2-5/8” from bottom edge instead.
     

Step 5:           
Sew vertical lines through all the fabric. Be sure to backstitch at the top and bottom.

Car pocket fabric: sewing lines from side are 1”, 3”, 5”, 7” and 9”.


Notepad & Crayon fabric: 5-5/8” and 7-5/8”


Step 6:           
Pin yellow felt onto black road fabric, spacing dividers evenly onto fabric. Sew around
edges of felt using zigzag stitching.


Step 8:           
Right sides together, sew main fabric piece & pocket-road pieces, leaving an opening. 
Turn right side of fabric out, fold opening and press.  Sew opening closed.

Thanksgiving Blessing Mix Tutorial

Here is the tutorial for the 'Blessing Mix' used in our "Gobble Til You Wobble" Kid-Friendly Thanksgiving Shoot with Anders Ruff.


A big thanks to Anders Ruff for customizing the cute ‘Blessing Mix’ bag toppers and poem to coordinate with their Happy Gobble Day printable package, (still available in their Etsy shop for only $12).  And a special thanks to Jen Carver of Banner Events & guest blogger to Anders Ruff for posting the tutorial on their site.

Here’s what you’ll need:


  • {FREE} Anders Ruff “Blessing Mix” printables that you can DOWNLOAD HERE.
  • Medium sized. cellophane bag (ours measured approx. 3.5″ x 6.5″ )
  • 1 pkg. of Bugles snacks
  • 1 pkg. of pretzels (not rods or sticks)
  • 1 pkg. of candy corn
  • 1 pkg. of orange candy slices (approx. $1 in candy aisle at Walmart)
  • peanuts (or substitute nuts of choice)
  • paper trimmer or scissors
  • hole punch
  • eyelets/grommets (optional)
  • twine, ribbon or raffia for embellishing
  • adhesive or glue
Project Steps:
1. Print the FREE Blessing Mix printables by {downloading them here}.

2. Trim the printable bag topper and poem to fit the size of the cellophane bag you are using. Note: We trimmed our Blessing Mix poem down to about 3 3/8 ” x 4 3/8″ to fit the size of our bag.


3. Fold the bag topper in half.


4. Punch two holes on your topper for threading raffia through. (You can dress up your Blessing Mix bag by adding metal eyelets/grommets if you wish, or just leave holes plain.)


5. Adhere ‘Blessing Mix’ poem to the front of your cellophane bag with adhesive of choice.


6. Fill your cellophane bag with a mixture of bugles, pretzels, candy corn, peanuts and orange slices with a heavier concentration on the bugles and pretzels. (Remember to allow enough room to be able to fold over the top of your cellophane bag prior to adding the bag topper.)


7. Fold over the top of your cellophane bag 2-3 small turns.


8. Attach bag topper to the filled bag by taking your hole punch and punching through the previous punched holes on the topper bag to go through the cellophane.. (Optional: Add grommets or eyelets.)


9. Thread raffia (or twine or ribbon) through the punched holes and tie. Trim any long or crazy ends.


Voilà! Blessing mix to share with your loved ones! Make one or twenty! They are that easy!

Friday, November 25, 2011

Gobble Til You Wobble: Kid-friendly Thanksgiving

It was a thrill to work along-side Jen of Banner Events on another Anders Ruff photo shoot.  Using AR's Happy Gobble-Day Thanksgiving Printables, we had a fun time coming up with a kid-friendly Thanksgiving.  A lot of times when you think of Thanksgiving, we think of formal table setting and filling our tummies with a hearty feast.  The children seem to get lost in this season of gratitude and so it was a breath of fresh air to know this year my three kids would be able to help prepare, plan and create a festive Thanksgiving for all ages.

To come up with ideas for our kid-centered Thanksgiving, we decided to go back in history to where it all begin - the first Thanksgiving feast, The Mayflower, and the Pilgrim & Indians. 

(AR post write- up credited to Jen Carver of Banner Events)
The Table:


Our Thanksgiving table was designed for kid-friendly fun. While we are frantically trying to put last minute touches on the meal, the last thing we need is a bunch of turkeys running wild. AR created the most adorable coloring/activity placemats and “I am Thankful” cards in their Gobble Day Collection which are perfect to use as mini activities to keep the kids entertained. With these activities in mind, we created a place setting for each child which included a turkey feathered vessel (mini trifle bowl)containing a crayon bundle tied with raffia, a few mini chocolate bars decorated with trimmed down party flags (to keep them from putting their hands in the food you are preparing), and a couple of pieces of ‘Gobble Gold” for the trading post. Adorable beverage labels dressed up clear glass mugs. We crafted mini Mayflower ships from felt and attached party circles to the sails to tie our Gobble Day theme together. An enlarged Mayflower was also hand sewn and provided a focal point for our table, with pilgrims and indians standing close by. We tied the colors from the printable package into our table decor with washable hand-sewn napkins, a handmade table runner and colorful plates and chargers.

Costumes:


Children LOVE dressing up {Hello…Halloween?} Using Anders Ruff’s printable feather indian headbands and pilgrim hats to jumpstart the costume idea, we added indian costumes we purchased at after-Halloween sales for $2 each, and I used my love of sewing to create peter pan-collared dresses in coordinating fabrics and feminine bonnets for the girls. The children had so much fun being in character and playing with rustic fans, flutes and toys.

Indian Trading Post:


In addition to designing a fun kid-centered tablescape together, we came up with the idea of an Indian Trading Post (in lieu of the traditional dessert table) where pilgrims and indians could trade ‘Gobble Day’ gold for edible after-dinner treasures.


Our hope was that the trading post would look rustic and authentic. We collected old chests, a wooden canoe top, crates, baskets, a fruit-filled cornucopia and wooden boxes, over-filling them with pumpkins, gourds and indian corn. A few pieces of modern Thanksgiving decor were added for festiveness. 


Creating the trading post was so much fun! We hung a neutral colored, herringbone fabric to create a backdrop and added different levels of artificial plants and trees to create the illusion of being outdoors. The ‘Happy Gobble Day’ banner from AR’s collection was attached to dark brown burlap and fastened between two trees with natural clothes pins and twine.


The focal point of our trading post was a life-sized teepee designed, that I was able to construct and sew using Smile & Waves tutorial.  I spray painted PVC pipe brown to look like wooden sticks.  I then used the pipe to hoist up the teepee exterior which was made by sewing together canvas paint drop cloths according to a specified pattern.

We used the varying baskets and crates to serve as our display for our trading post treats.

Here are some picture highlights of the Trading Post Treats:

Pumpkin Parfaits:


Delicious layers of pumpkin mousse, whipping cream and crushed Gingersnaps filled small canning jars. Keeping with the rustic look, canning jar lids were tied with raffia and adorned with brown cardstock and scalloped punched Gobble Day party circles. Crème filled Pirouette cookies accessorized with ‘Happy Gobble Day’ party flags topped off each pumpkin parfait.

Maize Favors:


Faux indian corn favors were fashioned from dried corn husks (purchased in the Hispanic food aisle of most grocery stores) tied around small bags of Reeses Pieces candy with tiny pieces of raffia. Each ear of corn was decorated on the top with a party flag and layered in a harvest basket.

Gobble Goodies:


One of my family traditions involves making ‘Gobble Goodies’ with her children. Our trading post would not have been complete without a half-dozen of these adorable turkeys displayed on a hand-painted canoe top, lined with green houndstooth printable paper. They are simple enough, kids can make these with very little assistance. Rice Krispy treats are rolled into small balls and attached to one half of an Oreo for the body, using frosting. Candy corn is ‘feathered’ around the base of another Oreo half and attached. Add edible candy eyes and a candy corn beak and voilà–Gobble Goodies galore!

Pumpkin Muffins:


Jen's children are obsessed with pumpkin bread. Instead of making it in loafs, we made it in muffin form and clothed them in colorful striped cupcake liners. How cute are those little turkey toppers from the Gobble Day collection? We simply cut them out, attached them to toothpicks and made a cute muffin topper out of them.

Teepee Cupcakes:


We couldn’t resist making these adorable teepee treats. Did you know you can bake a cupcake right inside a sugar cone? Neither did we (until we saw the idea on Pinterest)! After baking, simply cut off a small portion off the top of the sugar cone to allow for inserting 2-3 broken pretzel rods to look like sticks. Adhere them in your teepee with a little dab of chocolate frosting. Dip the bottom of your teepee in chocolate and roll in colorful sprinkles or candies. Insert a little coordinating party flag and you’ve got terribly cute teepee treats!

Turkey and Cornucopia Cake Pops:


Johanna Dellino of Pop.O.Licious Cake Pops graciously donated her original turkey and cornucopia cake pops for our shoot. Aren’t they so cute?! And trust me when I say, these little bites of goodness were gobbled up…and fast! Notice how perfectly they coordinate with the colors in AR’s printables? She customized them for us! (If you aren’t already a fan on Facebook, go here to become one!

Mini Apple Pies:


Aren’t things in miniature even cuter? I love these delicious (yes, I sampled a few of them!) mini apple pies that I made using premade pie dough.  I cut rounds out of the dough, placed them in muffin tins to bake, filled them with apple pie filling and topped them with an adorable little pumpkin shaped top crust and party flag. Coordinating pattern paper was used to make sweet little individual pie boxes with peek-a-boo acetate windows. Each box was dressed up with raffia and a circle tag.
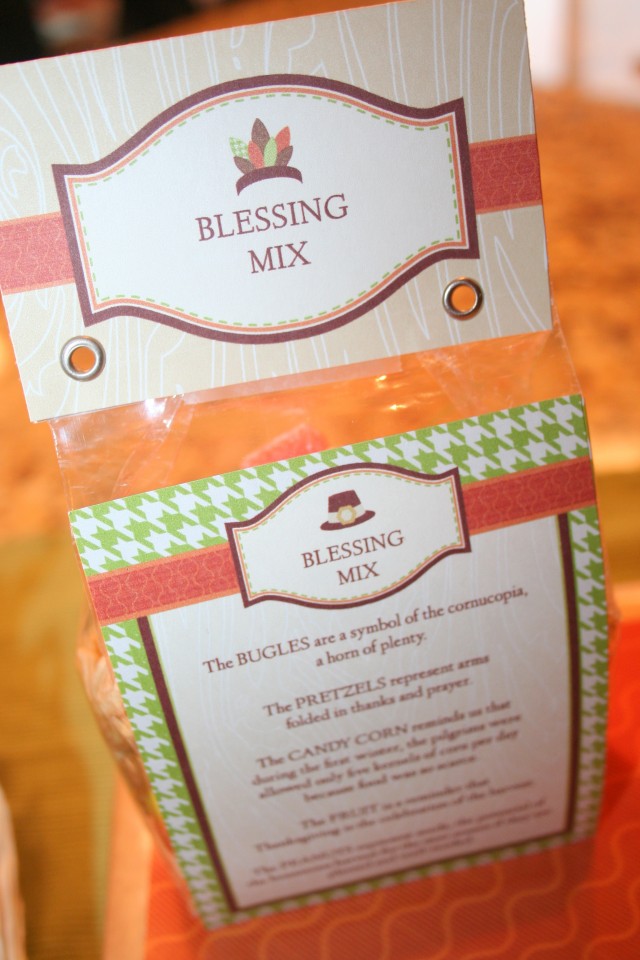
Blessing Mix:


It is always nice to tie in a little bit of teaching into each holiday. We put together these easy Thanksgiving “Blessing Mix” favor bags to help teach our children about some of the symbolism of the holiday. Cellophane bags were filled with a mix of bugles, peanuts, candy corn, pretzels and candy orange slices. A fold over topper was affixed to the top of each bag and an ingredients list and poem was added to the front.

We hope you love these Happy Gobble Day ideas! Our children can hardly wait to celebrate Thanksgiving—kid style!

Recognition:
A special thanks to Andrea Pasion of Andrea Pasion Photography.  Thank you for your friendship & always there to photograph our shoots.

A big thanks for Anders Ruff for their adorable kid-friendly "Happy Gobble Day" printables and being able to make our Thanksgiving a fun and memorable for our kids.

And of 'course I can't thank Jen enough for her brilliant write-up on Anders Ruff to share our ideas with the thousands of AR followers.

Thank you to Hostess with the MostessPizzazzerie, and Coupon Loving Chicks for sharing our Thanksgiving ideas to your many fans!

Vendor Credit:
Styling, decor & Desserts: Jennifer Carver (Banner Events) and Vivian Kerr (Kerr Kreations).
Graphic Designs:  Anders Ruff
Cake Pops:  Pop.O.Licious
Photography: Andrea Pasion Photography

Halloween Decorations & Gift Ideas

My dear friend, Jen Carver of Banner Events, was given the amazing opportunity to be the one & only guest blogger for Anders Ruff.  If you remember in the last post, Jen shared my son's pirate party for her first guest write-up.  It was a shock when she called me in early October asking if I would be willing to collaborate with her on a few holiday photo shoots that she will be featuring on Anders Ruff.  The opportunity to share our ideas for gift giving & decorations on a big party planning website was huge.  The best part of this was being able to work with one of my closest girl friends!  Here is Jen's write-up that shares over 25+ DIY Halloween Ideas using Anders Ruff Haunted Halloween Printables -

Projects 1-2: Altered Candy Bar Wrappers

Need a fast treat that is ‘too cute to spook’? Grab a couple of your favorite candy bars (we used the large sized Hershey bars, but any sized flat bar would work) . Print some of AR’s coordinating digital papers, treat labels & tags. Add some scraps of ribbon and recreate this look in minutes! (The Haunted House is a Paper Bliss sticker set.)

Projects 3-4: Altered beverage jars/carrier

We love projects that involve using recycled materials. This is one of our favorites. We had our friend save her Starbucks Frappuccino bottles & lids for us. Creating these cute bottles is easy. Wash & dry the bottles thoroughly. Add a coat of black spray paint to the lids. Fill with various Halloween candies. Use any of the adorable AR beverage wraps or trim the treat wrappers down to size and secure to the bottle with strong adhesive. (We like Stampin’ Up’ Sticky Strip.) We also added some raffia, a tag and some coordinating papers from AR’s collection to complete the look. As you can see from the picture, we also refashioned the cardboard Starbucks drink carrier by covering it in coordinating paper & reducing the AR letters to decorate the front!

Project 5: Altered Paint Can

Mini paint cans can be filled with all sorts of ghoulish delights and are easily decorated using printable elements from AR’s Halloween collection, scraps of coordinating ribbon and fabric.

Projects #6-7: Pumpkin Lantern & ’TREATS’ Banner

Re-create the pumpkin lanterns by tracing a leaf pattern on one of the green AR printable papers. Add a green chenile stem vine (twist around a pencil to get the corked look) and a brown chenile stem. Simply print out the TREAT sign, mount on black cardstock, punch holes and add ribbon or twine to hang.

Project 8: Trick or Treat Tote Bag

Vivian designed and sewed this adorable trick or treat tote bag. Don’t you just love the bat she printed from Anders Ruff’s Halloween collection onto iron on fabric transfers?

**  Please check back later for tote bag tutorial.

Project #9: Altered Gum Case

Easily transform an inexpensive pack of gum into an adorable Halloween favor. (Here we used Extra Dessert Delights brand gum, in an Orange Creme flavor.)

Project #10: Altered Tic-Tac Box


Who knew a scallop punch, circle punch, a button and a few elements from AR’s printable package could make an ordinary box of Tic-Tacs look so fun?!

Projects 11-12: Halloween Push Up Pops (Orange ice cream) & Coffin Treat/Display Box


We love coming up with unique ways to display desserts. How fun would your Halloween dessert table look with push up pops, cake pops, suckers and more coming out of coffins lined with styrofoam? Or, use the coffins to house other frightening treats. (We spray painted coffins, lined them with coordinating AR papers, topped the coffin lids off with AR’s darling treat labels cut to size and displayed our orange ice cream push up pops inside

Project 13: Witch Shoe Treat Favor


Hosting a ‘Ghouls Night Out’ and need a unique favor idea? These witch shoe favors may be the perfect thing. After all, ‘when the shoe fits…’ Notice the AR printable papers functioning as the shoe insole and the party circles as the toe embellishment. Fill each shoe with a little paper shred & a cute bag of treats.

Project #14: Altered Soda Bottle/Treat Favor


Who doesn’t love Jones Soda? We always have several Jones Soda bottles and lids on hand because they are easily filled with small candies (candy corn, chocolate, chips, M&Ms) and decorated for an easy favor. Add some raffia and ribbon, a hang tag or circle tag, and printable labels and you’re good to go!
Project #15: Halloween Treat Favor Bag
Create this cute little ‘tent’-style favor bag out of printable papers and embellishments. Attach a cellophane bag of treats inside.
Project #16: Halloween card
Use up some of the leftover printable scraps to create this simple Halloween card. We used glue dots to add dimension to the pumpkin.
Project #17: Halloween Treat Tin (filled w/ mini candy bars covered in candy bar wrappers)
IKEA sells these ‘spice’ tins that can be used for so many additional purposes. We decorated ours with Halloween circle toppers & coordinating papers and filled it with mini candy bars wrapped in coordinating Halloween wrappers.
Project #18: Halloween Paper Treat Sack (filled with white chocolate popcorn snack mix)
I love when I can use materials I have handy at home to create something new and fun! Sometimes a plain old paper sack is the perfect base for cute packaging. Fill your paper bag with this yummy white chocolate popcorn snack mix, add some raffia, a tag and sticker label & you’ve got the perfect treat to share with family and friends.
Project #19: Mummy Oreo Pops in Coffin Display

We found these adorable mummy oreo pops tutorial on How Does She?.
Project #20: Altered Tin Can/Treat Favor
This is another great project using recycled materials. Save up your clean aluminum cans. Decorate with cute labels, buttons & ribbon. Fill with paper shreds & treats! Voilà !
Project #21: Spooky Sucker with Halloween Medallion
Dress up an ordinary sucker with a 2″ circle topper and ribbon.
Project #22: 3-D Paper Pumpkins
Looking for a project that’s easy enough even your kids can do it? These 3-D pumpkins are made from strips of AR’s printable patterned papers, attached with brads at the top and bottom and dressed up with a handcut leaf, hang tag, raffia and twisted paperbag stem. Create just one or make a whole bowl full for a centerpiece. You can even insert a little bag of treats in the middle and give it as a gift.
Project #23: Distressed Wood Blocks (‘TRICKS’)
Need a quick, easy and inexpensive Halloween item to add to your home decor? Cut some wood blocks (or buy pre-cut & painted blocks). Sand, paint and distress them. Modge Podge or apply adhesive to the printable words included in AR’s Halloween set.
Projects 24-25: Bootiful Halloween Apron & Chef Hat
Our daughters absolutely loved the custom aprons and chef hats Vivian designed for them. She searched for fabrics which matched AR’s collection and had the BOO circle graphic enlarged to print on fabric iron on transfers. The girls had so much fun whipping up Halloween whoopie pies while wearing them.
Project #26: Bewitching Glassine Dessert Bags
‘BOO’tiful packaging doesn’t have to be expensive or time-consuming. Print off AR’s 2″ labels onto sticker paper. Punch out the designs and easily adhere to glassine bags. We love putting individual servings of desserts inside (Halloween whoopie pies seen above, but cookies, brownies, pretzels, etc… could be substituted.)
Supplies needed to complete all projects: Anders Ruff’s printable Halloween package, scissors, various paper punches, hole punch, paper trimmer, adhesive, various Halloween ribbon, cardstock, raffia, twine, full-page sticker labels, glassine bags, metal tin, cellophane bags, glossy photo paper, buttons, fabric, fabric iron-on transfers, sewing machine, thread, spray paint, empty Jones Soda & Starbucks Frappuccino bottles, wood blocks, sand paper, brown paper sacks, push up pop containers, brown paper-mâché coffin boxes, various Halloween candy/treats, mini Hershey bars, large Hershey bars, suckers, sucker sticks, orange paper lanterns, pipe cleaners
Recognition:
Thank you Anders Ruff for their Haunted Halloween Printables and letting us get creative with them. 

A special thanks to Jen for amazing guest post featuring our 25+ Spooktacular DIY Halloween Ideas on Anders Ruff. 

A big 'Thank You' to Hostess with the Mostess, Pamper Me Fabulous, Brittany Victoria Jewelry for sharing our halloween ideas with you fans!
Resource/Vendor Credits:
Styling: Jen Carver & Vivian Kerr
Anders Ruff Custom Designs: Halloween printables
Andrea Pasion: Photography
JoAnn Fabrics: fabric for aprons/chef hats/tote bags, paper-mâché coffin boxes, pumpkin lanterns (from Martha Stewart kit), sucker sticks, buttons, craft foam (for lining coffins)
Michaels Crafts: raffia, Halloween ribbon, jute/twine, cellophane bags, mini paint can
Stampin' Up!: craft punches, cardstock, Snail adhesive, Sticky Strip, gold thread
Wal-Mart: black spray paint, glossy photo paper, Avery full-sheet sticker labels
Cash and Carry: glassine bags
JB Prince: push up pop containers
IKEA: metal tins
Party City: candy, suckers